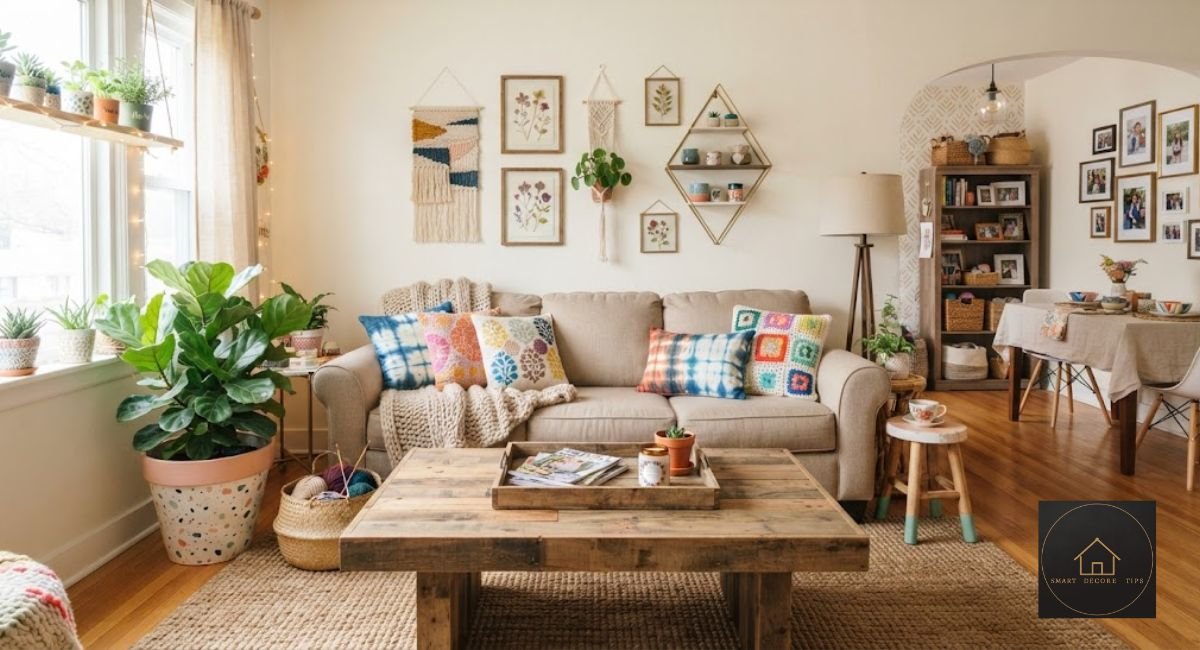
75 DIY Home Decor Ideas to Transform Every Room on a Budget
Looking for DIY home decor ideas that make your home feel more personal without spending too much? You can create decorations with everyday materials, refresh suitable furniture, make wall art, or add handmade accessories to different rooms.
The right project depends on your space, budget, decorating style, and experience. This guide brings together 75 ideas for living rooms, bedrooms, kitchens, bathrooms, walls, and rental homes, with practical considerations to help you choose.
Internal-link requirement: Add one relevant Smart Decor Tips internal link near this introduction after selecting a genuinely related existing guide. No suitable supporting URL was supplied for this audit, so no destination has been invented.
How to Choose the Right DIY Home Decor Project
A useful DIY project solves a decorating problem. Before choosing one, identify whether the room needs color, storage, lighting, texture, or a focal point. Consider the furniture already in the room, how people use the space, and whether the finished object will be easy to maintain.
- What needs improvement? An empty wall may need artwork, while a cluttered entryway may benefit more from storage.
- What is your budget? Decide what you can spend on materials and tools before shopping.
- What skills do you have? Paper crafts and simple displays are approachable starting points. Furniture refinishing and woodworking need more preparation.
- How much space is available? A large floor-standing display may not suit a small apartment; a wall-mounted option may use space more efficiently.
- Can the change be reversed? Renters should check lease terms and favor removable or freestanding options when permission for permanent changes is uncertain.
| Project type | Typical experience | Main consideration |
| Paper and fabric crafts | Beginner | Durability and finish |
| Decorative jars and frames | Beginner | Stability and material compatibility |
| Wall art and picture displays | Beginner | Hanging method and wall type |
| Furniture painting | Intermediate | Surface preparation and ventilation |
| Wooden shelving | Intermediate | Wall construction and load |
| Built-in changes | Advanced | Measurements, utilities, and structural safety |
Choose the project that addresses the room’s actual need. A handmade headboard may add more value to a plain bedroom than several small ornaments. In a cluttered living room, useful storage may be a better choice than another decorative display.

Simple DIY Home Decor Ideas
DIY home decor ideas on a budget (choosing lower-cost projects)
Simple projects are a good starting point if you want to refresh a room without taking on complicated construction. Reusing sound household items can reduce new purchases, although cleaning, repair, and preparation still take time.
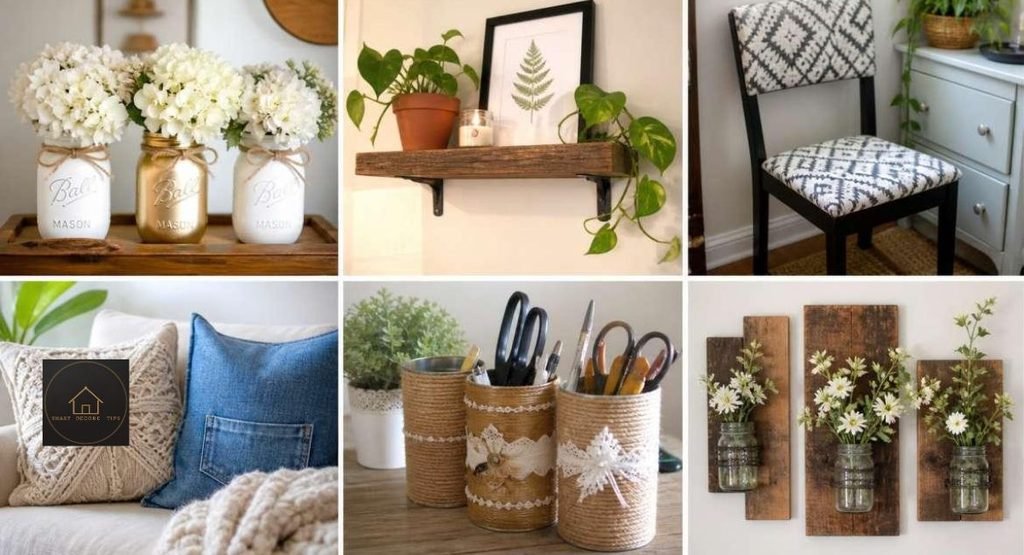
1. Painted glass jars. Clean suitable jars and decorate the outside with glass paint made for the surface. Use them for artificial flowers or craft supplies. Do not use decorative finishes on food-contact surfaces unless the product is approved for that use.
2. Fabric-covered storage boxes. Cover sturdy cardboard boxes with fabric and secure the edges neatly. Use them for lightweight items in dry rooms; cardboard is not a good choice beside sinks or damp areas.
3. Repurposed picture frames. Refresh old frames with a suitable finish and replace outdated artwork with photographs, fabric, or prints.
4. Handmade decorative trays. Update a sound wooden tray with a suitable finish. Use it to group small accessories on a coffee table or dresser.
5. DIY fabric cushion covers.
Make removable covers from suitable fabric. Check care instructions and choose colors that relate to existing upholstery.
6. Decorative book stacks. Arrange books by size or cover color and leave enough space for everyday use. A small object can sit on top without making the table crowded.
7. Painted terracotta pots. Decorate the outside of planters with paint suitable for the intended use. Keep drainage openings clear.
8. Handmade fabric coasters. Layer suitable fabric or felt and add a stable backing. Choose materials that can handle the moisture expected from drinkware.
9. Decorative air-dry clay bowls. Shape clay into small catchall dishes for keys or jewelry. Follow the manufacturer’s drying instructions; do not use them for food unless the material and finish are certified for that purpose.
10. Recycled framed displays. Arrange fabric samples, decorative paper, or other flat materials inside frames to create coordinated wall art.
Practical choice: Start by repainting, reframing, or repurposing items you already own. This can reduce material purchases, but it is only worthwhile when the item is sound and the finish can be prepared properly.
DIY Home Decor Ideas for the Living Room
DIY home decor ideas living room (living-room project selection)
Living-room projects should work with seating, circulation, lighting, and storage. Decorative objects should not block walkways or make tables difficult to use.
11. DIY throw pillow covers. Make removable covers in fabric that complements the sofa. Pair one pattern with simpler solid colors rather than combining many competing prints.
12. Floating display shelves. Choose shelves and fixings suitable for the wall construction and intended load. Check for hidden wiring or plumbing before drilling.
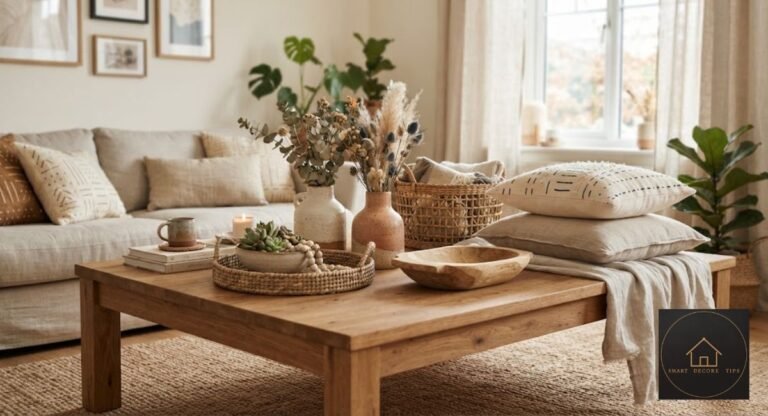
13. Coffee-table centerpiece. Group a tray, a small vase, and one or two accessories. Leave usable surface area for drinks and books.
14. Handmade fabric wall hanging. Use a dowel with fabric strips, yarn, or macrame cord. Repeat colors already present in the room.
15. Decorative blanket ladder. Use a stable, properly constructed rack and keep it positioned where it cannot obstruct a walkway or tip easily.
16. Customized picture frames. Paint frames in coordinated shades and plan the arrangement before hanging.
17. Artificial plant arrangement. Place artificial greenery in a stable pot where a real plant may not receive suitable light or care.
18. Painted wooden side table. Refresh a structurally sound table with a finish suitable for its material. Clean and prepare the surface according to product directions.
19. Decorative magazine holder. Make a holder from suitable wood, fabric, or sturdy board and position it beside seating.
20. DIY candle display
Use stable candleholders and keep burning candles away from fabric, paper, curtains, and other combustible materials. Never leave a burning candle unattended.
21. Personalized photo ledge. Install a narrow ledge with appropriate fixings. It allows framed prints to be changed without repeatedly rehanging each one.
22. DIY decorative plant stand. Repurpose a stable stool or build a stand suited to the planter’s weight. Protect the surface from water.
23. Fabric-covered lampshade. Only use materials and methods compatible with the lampshade and lamp manufacturer’s heat and clearance requirements. Do not cover ventilation openings.
24. Upcycled wooden crate storage. Inspect the crate, smooth rough edges, and apply a suitable finish before using it for lightweight blankets or accessories.
25. Textured wall art. Use a canvas and compatible modeling material to create a raised abstract design. Follow drying and finishing directions.
Styling tip: Repeat a small number of colors across cushions, artwork, and accessories. Leave open space around displays so the room does not feel crowded.

DIY Decoration Ideas for Walls
Wall decorations can add color and texture without replacing furniture. Match the scale of the display to the wall and nearby furniture, and use hanging hardware suitable for the object’s weight and the wall material.
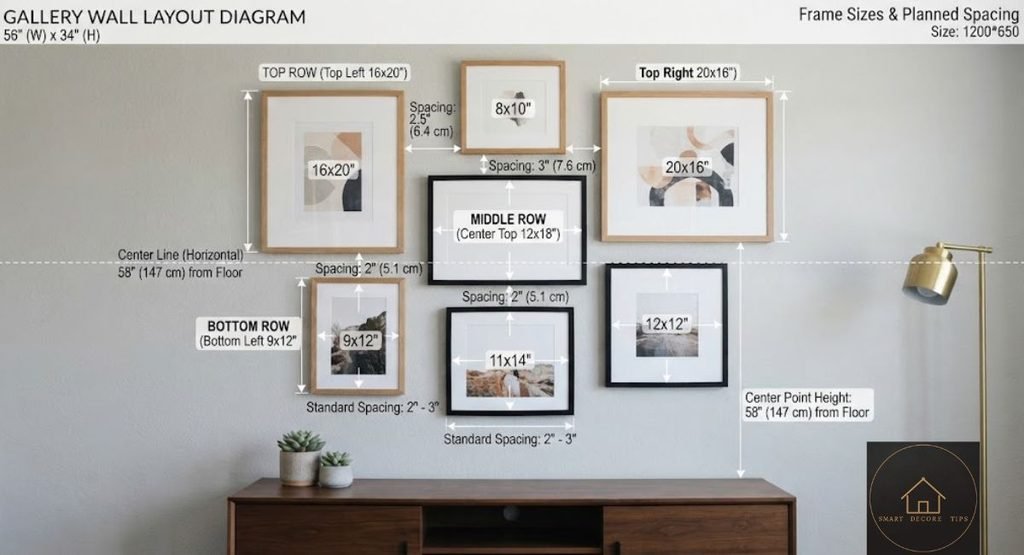
26. DIY gallery wall. Plan a mix of photographs, artwork, and illustrations. Use paper templates to check the arrangement before making holes.
27. Framed fabric artwork. Place attractive fabric inside a frame or stretch it over a suitable backing for a textured display.
28. Handmade paper flower display. Create paper flowers in a coordinated palette and arrange them on a panel or inside a frame.
29. Decorative mirror arrangement. Group mirrors of different shapes and check the weight and mounting requirements of each piece.
30. Painted geometric wall panel. Use painter’s tape and compatible interior paint. Test the tape on an inconspicuous area, especially on delicate or recently painted surfaces.
31. DIY picture ledges
Install a narrow ledge with fixings appropriate for the wall and expected load.
32. Macrame wall hanging. Use cotton cord and a dowel to make a textured accessory. Ensure the hanging point can support the finished item.
33. Decorative wooden wall grid. Arrange finished wooden strips on a suitable backing and plan how the panel will be secured before installation.
34. Botanical wall art. Frame pressed botanical materials or botanical illustrations. Keep natural materials away from excess moisture and strong direct sunlight.
35. Personalized typography display. Create a framed print with a short original phrase, family name, or meaningful word. Choose lettering that remains readable at normal viewing distance.
| Wall situation | Possible project | Check before starting |
| Large empty wall | Gallery wall | Overall scale and frame layout |
| Small apartment wall | Picture ledge | Depth and available clearance |
| Bedroom feature wall | Fabric artwork | Color and texture |
| Rental property | Removable display | Lease terms and surface compatibility |
| Narrow hallway | Vertical artwork | Walkway clearance |
| Dim room | Mirror arrangement | Secure mounting and reflected light |
Avoid filling every empty section of a wall. Open space around an arrangement helps individual pieces remain visible.
DIY Home Decor Projects for Every Room
Each room has different practical needs. Bedrooms benefit from comfortable, personal details; kitchens need easy-to-clean organization; bathrooms require materials that tolerate humidity and occasional splashes.
Bedroom decorating projects
36. DIY upholstered headboard. Cover a suitable headboard panel with upholstery fabric and appropriate padding. Choose a fabric that works with the bedding and can be maintained.
37. Decorative bedside organizer. Make a fabric-pocket or compartment organizer for frequently used items. Keep the bedside surface usable.
38. DIY jewelry display. Use a framed backing panel and suitable hooks to organize necklaces and bracelets. Match the hooks to the weight of the items.
39. Updated bedside lamp base. Refresh the exterior of a compatible lamp base with a suitable finish. Do not alter electrical components unless qualified.
40. Fabric storage basket. Sew or assemble a basket with a stable base for scarves and accessories.
Kitchen and dining-room projects
41. DIY utensil holder. Decorate a stable container for kitchen utensils. Choose a material that is easy to clean and appropriate for the environment.
42. Handmade table centerpiece. Arrange a vase, branches, or a seasonal display in a low-profile container so people can see across the table.
43. Decorative menu board. Create a reusable menu display with a suitable board and writing surface. Position it where household members can read it.
44. DIY pantry labels. Make coordinated labels for pantry containers and storage baskets. Use clear wording and a material that suits the storage conditions.
45. Customized table placemats. Make placemats from washable fabric or another material appropriate for dining use.
Bathroom decorating projects
46. Decorative bathroom storage baskets. Use baskets for towels and spare supplies. Keep moisture-sensitive materials away from areas that regularly get wet.
47. DIY countertop tray. Use a tray with a finish that can handle occasional splashes to group soap dispensers or toiletries.
48. Customized mirror frame. Add a compatible decorative frame and choose materials suitable for bathroom humidity.
Entryway and hallway projects
49. Handmade key holder. Create a small organizer with securely attached hooks and mount it where an opening door will not strike it.
50. DIY entryway catchall. Make a shallow tray or bowl for keys and mail and place it on a stable surface.
51. Refreshed entryway bench. Update a sound bench with a suitable finish or cushion. Check the structure before using it as seating.
52. Wall-mounted coat organizer. Use fixings appropriate for the wall and expected load. Keep hanging items clear of the walkway.
Home office and outdoor projects
53. DIY desk organizer. Use divided trays or small containers to group stationery, cables, and accessories by function.
54. Decorative bulletin board. Cover a suitable board with fabric and use it for reminders, photographs, or notes.
55. Outdoor planter display. Group planters made from materials and finishes intended for outdoor exposure. Consider sunlight, drainage, and weather.
Avoid using the same material in every room. A fabric basket may suit a dry bedroom, while a bathroom organizer needs to tolerate humidity and occasional splashes.
DIY Crafts for Home Decor Using Everyday Materials
Craft-based decorating is useful for smaller decorative objects rather than major changes to furniture or room layout. Fabric, paper, wood, clay, glass, and rope each have different strengths and limitations.
56. Macrame plant hanger. Use suitable cotton cord and secure knots. Check the support point and total weight before suspending a planter.
57. Handmade paper lantern. Use craft paper and a battery-operated light. Keep paper away from open flames and heat.
58. DIY wooden bead garland. String wooden beads on suitable cord for a shelf, tray, or seasonal display.
59. Air-dry clay wall ornaments. Shape clay into decorative forms and follow the manufacturer’s drying and finishing directions. Do not assume the finished piece is waterproof.
60. Fabric scrap bunting. Cut leftover fabric into matching shapes and attach them to suitable ribbon or cord.
61. Handmade decorative wreath. Arrange artificial greenery, fabric, or other suitable decorations on a wreath base.
62. DIY decorative rope basket. Wrap rope around a stable base and secure it with suitable adhesive or stitching. Use it for lightweight items.
63. Decorative bottle arrangement. Clean suitable bottles and reuse them as vases or decorative objects. Check for sharp edges and choose a finish compatible with the bottle.
64. Handmade fabric wall pockets. Sew pockets onto a suitable backing to organize lightweight items in an office or craft room.
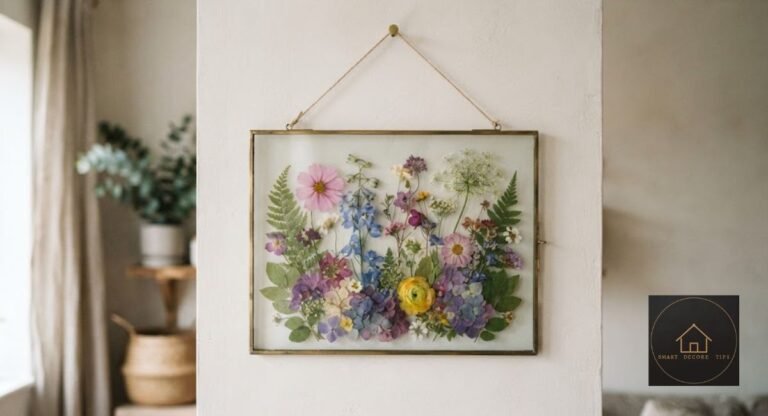
65. DIY pressed-flower frames
Arrange dried flowers inside a frame and protect them from moisture and strong direct sunlight.
66. Decorative wooden coasters. Use smooth wooden pieces and a finish appropriate for tabletop use. Check edges and surface protection.
67. DIY decorative storage tins. Clean and decorate tins for lightweight storage. Check for sharp edges and do not use damaged containers.
68. Handmade seasonal table decorations. Make reusable displays from fabric, paper, or wood and store them carefully between seasons.
| Material | Suitable uses | Main limitation |
| Cotton fabric | Cushion covers, bunting, wall pockets | May need washing and sewing |
| Cardboard | Storage boxes, paper displays | Limited moisture resistance |
| Wood | Shelves, trays, frames | Needs suitable preparation and finish |
| Glass | Vases and decorative jars | Can break if dropped |
| Air-dry clay | Decorative bowls and ornaments | Not automatically waterproof or food-safe |
| Rope and cord | Baskets, hangers, wall art | Needs secure knots and attachment |
| Paper | Flowers, lanterns, artwork | Sensitive to moisture and heat |
Choose materials for the item’s actual use. Decorative cardboard storage may work in a dry bedroom but is unsuitable beside a bathroom sink.
Renter-Friendly DIY Decorating Projects
Renters may face restrictions on drilling, repainting, or replacing fixtures. Check the lease and obtain permission where required. Removable products are not automatically damage-free; their suitability depends on the adhesive, wall finish, paint condition, and manufacturer’s directions.
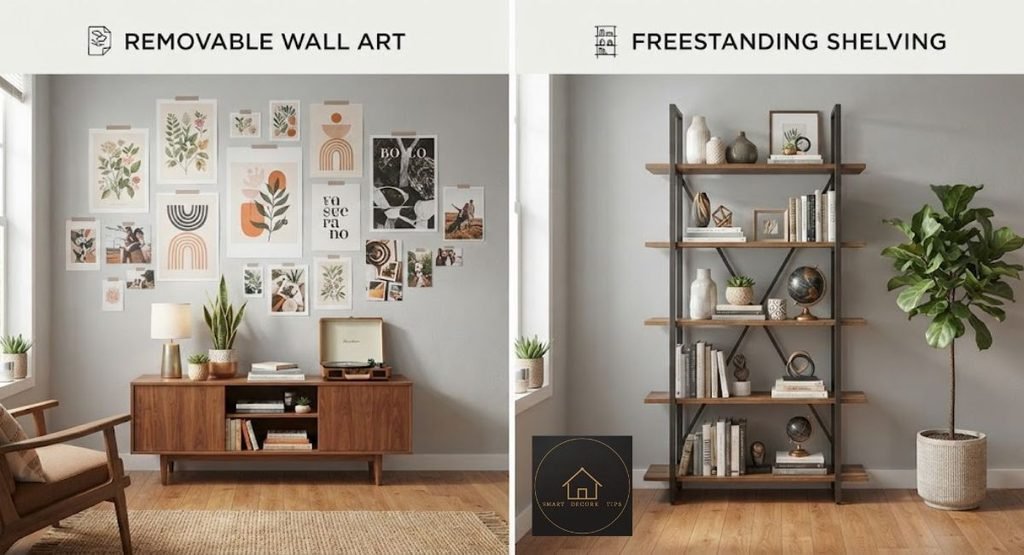
69. Removable wall art arrangement. Use compatible removable picture-hanging products or freestanding frames. Check weight and surface restrictions.
70. Freestanding decorative shelves. Choose a stable bookcase or shelving unit rather than making permanent wall changes. Secure tall furniture against tipping using an approved method.
71. Decorative peel-and-stick accents. Test products on a discreet area and follow removal instructions. Some adhesives can damage paint or wallpaper.
72. Fabric wall decoration. Display lightweight textiles with a suitable removable method and check that the wall finish can tolerate it.
73. Reversible furniture update. Use removable covers or accessories designed for the furniture rather than permanently changing its finish.
74. Layered floor decor. Use an area rug to define a seating space and choose a suitable rug pad to reduce slipping and protect the floor.
75. Portable decorative lighting. Use compatible table lamps or battery-operated lights without making permanent electrical changes. Arrange cords safely.
- Read the manufacturer’s surface and weight restrictions.
- Check lease terms before installing or applying anything.
- Test removable adhesives in an inconspicuous area.
- Do not cover outlets, vents, or access panels.
- Keep furniture and displays stable.
- Photograph the property’s original condition before making changes.
For renters, freestanding furniture, removable textiles, and portable lighting are flexible starting points. They may take up floor space, while adhesive products save space but can damage unsuitable surfaces. Choose according to the room and the property’s rules.
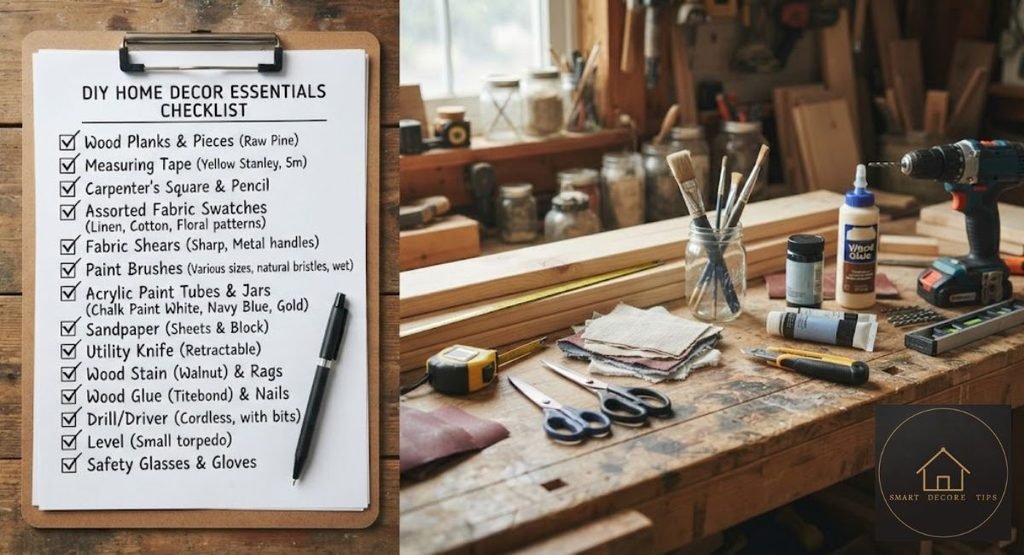
DIY Home Decor Materials, Tools and Safety Tips
Preparation helps prevent avoidable damage. Start with the supplies required for the project rather than buying a large collection of tools.
| Category | Examples | Common use |
| Measuring tools | Tape measure, ruler, level | Planning and positioning |
| Cutting tools | Craft scissors, utility knife | Paper, fabric, and suitable materials |
| Painting supplies | Brushes, rollers, painter’s tape | Decorative finishes |
| Fastening supplies | Suitable screws, hooks, anchors | Installation |
| Adhesives | Craft glue, compatible construction adhesive | Joining suitable materials |
| Finishing supplies | Sandpaper, compatible sealant | Surface preparation and finishing |
| Protective equipment | Safety glasses, task-appropriate gloves | Task-specific protection |
Lead-paint precautions for older homes
Homes built before 1978 may contain lead-based paint. Sanding, scraping, drilling, or other work that disturbs lead-based paint can create hazardous dust.
The US Environmental Protection Agency recommends that homeowners consider hiring a lead-safe certified contractor for renovation, repair, or painting projects in pre-1978 homes. If you do the work yourself, follow the EPA’s DIY lead-safe work practices, including containing the work area, minimizing dust, protecting yourself, and cleaning thoroughly.
Important limitation: EPA rules differ for homeowners working in their own homes, landlords, and paid contractors. Renters should contact the landlord or property manager before disturbing painted surfaces.
Read the EPA’s Lead-Safe Renovations for DIYers guidance before starting work that could disturb old paint.
Other practical safety precautions
- Use eye and hand protection appropriate for the task.
- Follow product directions for ventilation, drying, curing, and cleanup.
- Keep sharp tools away from children and pets.
- Check wall construction and load requirements before installing shelves.
- Do not modify electrical wiring or fixtures unless qualified to do so.
- Keep candles and other heat sources away from combustible decorations.
Common DIY decorating mistakes to avoid
| Mistake | Why it causes problems | Better approach |
| Buying materials before planning | Can lead to unnecessary purchases | Choose the project first |
| Using too many colors | Can make displays feel disconnected | Repeat a limited palette |
| Ignoring room proportions | Objects may look too large or small | Plan around existing furniture |
| Using unsuitable adhesives | Products may fail or damage surfaces | Check material compatibility |
| Overcrowding shelves | Reduces usable space | Leave open space between objects |
| Skipping surface preparation | Can affect the finish | Follow product preparation instructions |
| Ignoring stability | Furniture and displays may tip | Use suitable supports and fixings |
Read More about Home Decor Styles:
- Home Decor Styles: Names, Examples & How to Decorate Each
- Best Interior Design Styles: 8 Looks to Know Before You Decorate
- Modern Interior Styles: What Really Counts as Modern, and Which Branch to Pick
Frequently Asked Questions
What are the easiest DIY decorations to make at home?
Painted glass jars, fabric-covered storage boxes, cushion covers, picture-frame displays, and decorative trays are approachable starting points.
They generally involve fewer construction steps than furniture or shelving projects. Choose materials according to the item’s use and the surface you plan to decorate.
How can I decorate my home without buying new furniture?
Rearrange existing furniture and update smaller details first. Refresh suitable accessories, replace cushion covers, reframe artwork, and repurpose containers as organizers. You can also create a display using books, photographs, and objects you already own.
What DIY home decor works best in a small apartment?
Vertical displays, narrow picture ledges, wall pockets, compact organizers, and portable lighting can work well in smaller homes. Check available wall and floor space before choosing a project. Freestanding pieces may be preferable when permanent alterations are not allowed.
How do I make handmade decorations look coordinated?
Choose a consistent color palette and repeat selected materials or finishes across the room. Natural wood, neutral fabric, and a small amount of greenery can work together. Vary shapes and sizes so the arrangement does not look overly uniform.
Are peel-and-stick decorations safe for rental walls?
They may work on compatible surfaces, but results depend on the adhesive, wall finish, paint condition, and manufacturer’s instructions. Some removable products can still peel paint or damage wallpaper. Check your lease, test a discreet area, and follow removal directions.
Final Thoughts
The most useful DIY decorating projects suit your home, budget, and daily routine. Start with one area and decide what it needs: a handmade accessory, a refreshed piece of furniture, a wall display, or more practical storage.
Prepare the materials, check safety requirements, and focus on completing the project properly. Small, considered changes can help a home reflect the people who live there without requiring a complete makeover.
How This Guide Was Made
This guide was prepared for Smart Decor Tips by reviewing the competitor pages supplied for Stage 1: Allison Marie Alexander, In My Own Style, The Home I Create, HGTV, and Good Housekeeping.
The review considered DIY editorial roundups, home-decorating tutorials, visual project galleries, and US Environmental Protection Agency guidance on lead-safe DIY renovation.
The EPA source was checked on October 29, 2026. Recommendations were organized by intended room, material suitability, practical purpose, skill considerations, and renter or homeowner use.
This is an editorial research guide, not a report of hands-on product testing. Project costs and completion times are not stated because reliable project-specific estimates were not established. Editorial note before publication:
Add relevant internal links only after confirming the destination URLs and their topical relevance. Suggested opportunities include a living-room decorating guide, wall-decor tutorial, and beginner DIY guide, if those pages exist.

Hi, I’m Shahzad Ahmad welcome to Smart Decore Tips!
I write and research every guide on this site myself, focused on real, practical home decor advice for renters, first-time homeowners, and small-space living. Before publishing anything, I check actual product listings, current prices, and real customer reviews not just what other sites already say.
My goal is simple: help you make smarter, more affordable decor decisions without the guesswork or sales pitch.
4 Comments